Adding PowerShell Scripts to VitalSigns
- Chandler Berry
Analytics
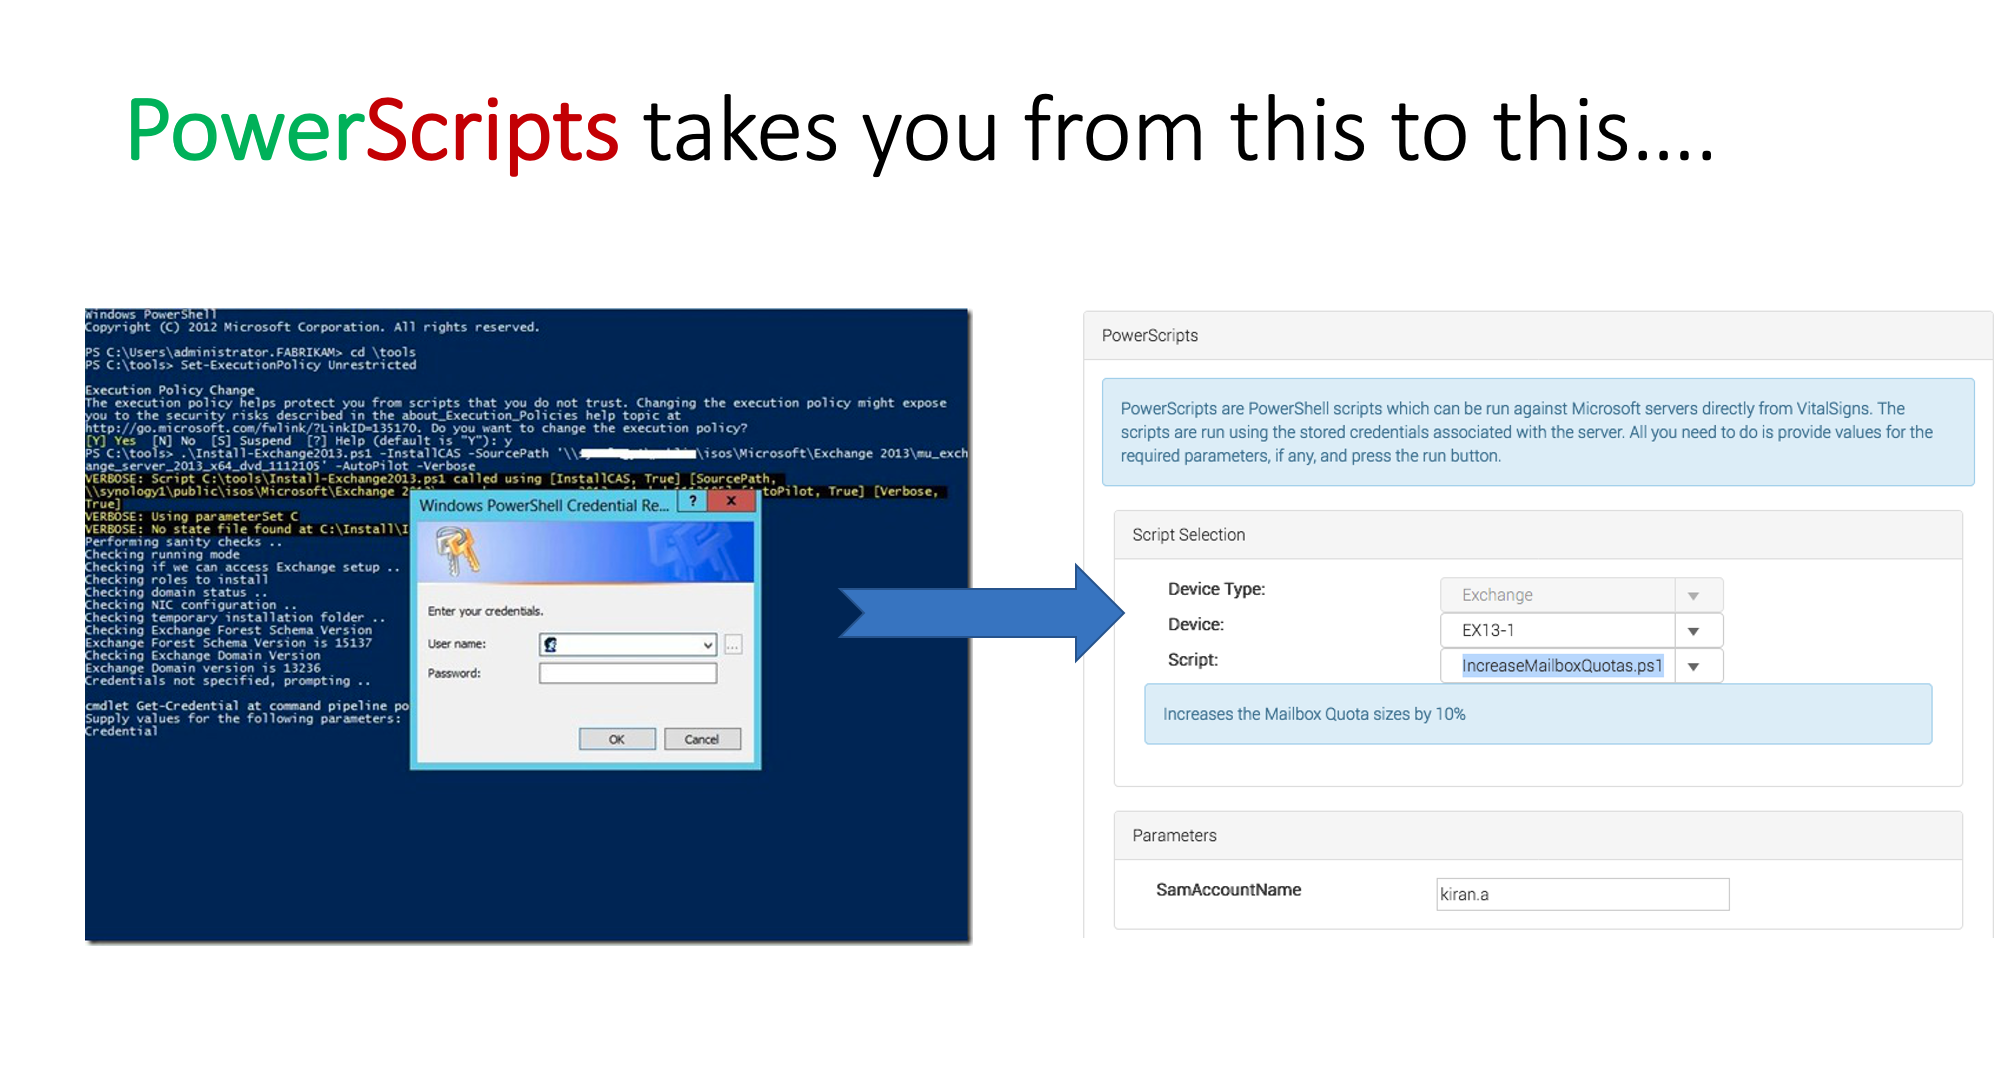
A powerful option to the PowerScripts feature of VitalSigns is the ability to run your own scripts! This page explains how this capability can be best leveraged.
About adding PowerShell Scripts to VitalSigns
PowerShell scripts are powerful scripts, as they allow control over multiple Microsoft Products, as well as Windows services. However, this information is probably old news for most PowerShell users.
There is a couple different ways that Scripts can be added to VitalSigns:
- Through the VitalSigns UI
- Through the VitalSigns' Server File System
What option is best or easiest varies from situation to situation. This page will help admins decide which to use in what situation.
VitalSigns UI
Scripts can be added to VitalSigns through the UI. Proper permissions must be given to the logged-in user to access the required pages, however. The user needs the PowerScripts Manager Access level to be able to access the proper VitalSigns pages. Find out how to Add/Remove Access levels here. Once the proper access is obtained, follow the below instructions to add a Script to VitalSigns
- Navigate to the PowerScript Settings page in the Configurator.
- Select the Scripts Management tab.
- Click the Add button.
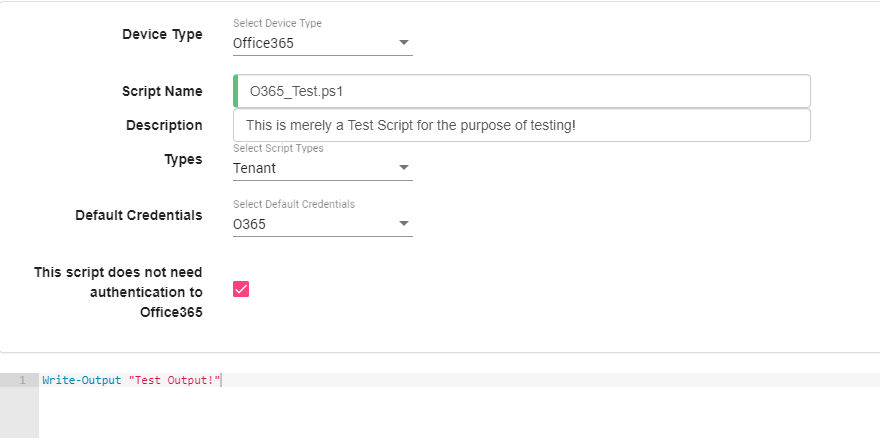
From the resulting modal that populates the screen, a script can be pasted directly into the Code are at the bottom. On this screen, you also have to fill out multiple fields that helps VitalSigns know what to do with the script, and where to display the Script for use. Those fields are the following:
- Device Type
-This Field denotes what type of machine/service this Script will run against. For instance Office365 or an On-Prem Exchange server - Script Name
- This Field is the name that you wish to give the script. This should end with the file extension .ps1 - Description
- This Field explains what the script will do. VitalSigns will display this Description Field when the script is selected - Types
- This Field sets on which pages the Script will be visible, and able to be run from - Default Credentials
-This Field specifies what saved Credentials to use while executing the script. - This script does not need authentication to Office365
-This Field tells VitalSigns not to connect to O365 servers while executing the script. Useful for running local-only scripts.
When pasting in existing scripts, make sure that the parameters follow our guidelines. Not all Parameter types are currently supported.
Known Parameters that don't work with PowerScripts currently
- Switch (Use a boolean type for now)
- hashtable
- Certain Arrays (So far Int arrays aren't getting picked up)
File System
Scripts can also be added directly through the File System of the VitalSigns server. This method is mostly drag-and-drop, as long as the proper instructions are followed. The steps for preparing a script for use in PowerScripts for VitalSigns are detailed below:
Ensure that the PowerScripts header is pasted at the top of the file.
- The header is a comment block that VS uses to be able to know where to show the script, and what server/service to use it against.<# FOR VITALSIGNS USE .DESCRIPTION This is the description of the script. .SUBTYPES [Tenant] #>
-Under the .DESCRIPTION flag, type out the description that should display when the Script is selected.
-Under the .SUBTYPES flag, type out what type of script this will be.
See Graphic to the right for all Subtypes →-There is an optional field .BYPASSAUTHENTICATION that fuctions the same as the This script does not need authentication to Office365 check-box detailed above in the VitalSigns UI portion of the page. To use this field, paste in the following at the end of the header comment block:
.BYPASSAUTHENTICATION
true
- Lastly, there is another optional field .CREDENTIAL that contains a hashed reference to a credential inside VitalSigns. This field is best to be set by VitalSigns in the Configurator.
Once the Script has been successfully modified, navigate to the directory below in File Explorer on the VitalSigns Sever.
C:\inetpub\wwwroot\API\wwwroot\PowerShellScripts
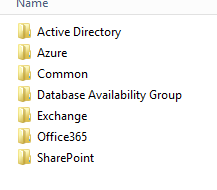
- From here, select what Server/Service type that the script should be run against, and open its corresponding Folder.
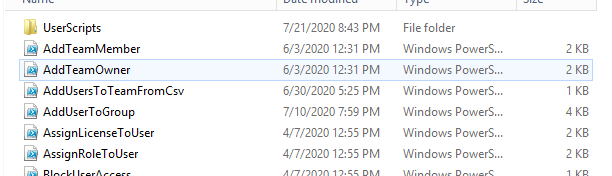
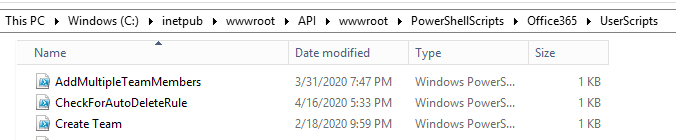
From this Folder, open the UserScripts Folder.
During an upgrade, VitalSigns will delete all PowerScripts that aren't in the UserScripts folder. Putting them in the Root folder for the server type will result in the Script being deleted.
Paste the Script inside.
The newly configured PowerScript is now ready to be used with VitalSigns
ActiveDirectory
Azure
Tenant
VirtualMachine
WebApp
Database Availability Group
Exchange
Mailbox
Office365
Groups
Mailbox
RoomsResources
SharePointSites
Teams
User
SharePoint