Adding a Office 365 Graph API Key to VitalSigns
- Chandler Berry
- Alan Forbes
Many of the API calls that VitalSigns makes have recently been deprecated by Microsoft. To continue to get this data, we have utilized Microsoft's own Graph API.
Azure Portal
Detailed in this document is the process for adding the Graph API to VitalSigns to utilize VitalSigns rich metrics and Administrative abilities.
The first steps of this process are below:
- Navigate to the Office365 portal.
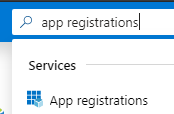
http://portal.azure.com - At the Search bar on the Top of the Screen, type in the search term App registrations, and select it from the results
- Click on the New Registration button.
- Enter a recognizable name, then click the Register button at the bottom of the page.
- From the Left Pane of the resulting page, select the menu item labelled API permissions.
- Click on the button labelled Add a permission
- From the resulting pane on the right, select Microsoft Graph
- Select Application permissions
- From the list that populates, select the following permissions:
If you want VitalSigns to collect information about your tenant (required to populate the O365 tabs), then give it minimal Read rights:
- Group.Read.All
- Reports.Read.All
- Sites.Read.All
- Files.Read.All (reserved for future features related to reporting on OneDrive usage)
If you want VitalSigns to be able to collect information about your tenant, AND perform end user experience testing then it will require more elevated rights:
- Calendars.ReadWrite
- Files.Read.All
- Group.ReadWrite.All
- Mail.ReadWrite
- Mail.Send
- Reports.Read.All
- Sites.Read.All
- Click on the Add permissions button.
- Click on the Grant admin consent for <Directory Name> button
- Click Yes on the resulting pop-up.
- Navigate to the Overview page from the left Navigation Pane.
- Click the Copy to Clipboard button next to the field titled Application (client) ID
Continue on to the VitalSigns UI portion of these steps.
STOP Do NOT continue with step 16-19 until told so by the steps in the VitalSigns portion of this guide
Navigate to the Certificates and secrets page from the left Navigation Pane.
- Click on the New client secret button
- Give a Name to the secret, and click on the Add button.
- Click the Copy to Clipboard button next to the Value
2.  | 3.  | 4.  |
5.  | 6.  | 7.  |
8. | 9. | 10. |
11. | 12. | 13. |
14. | 16.  | 17.  |
18.  | 19.  |


VitalSigns UI
This portion of the guide takes place in the VitalSigns UI.
- Navigate to and log in to your VitalSigns Environment
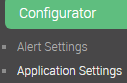
- Navigate to the Application Settings page, under the Configurator category
- Select the credentials tab
- Click the Add button to add a new set of credentials.
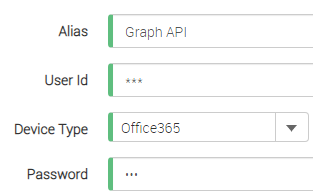
- Fill out the fields with the following:
- Alias: A name for the credentials
- User ID: The string you copied from Application (client) ID
- Device Type: Office 365
Password: This is the value of the Secret
At this point, you can finish step 16-19 in the Azure section of this guide.
- Click the Save button.
2. | 3. | 4. |
5. | 6. |


Setting up Azure to allow Login in VitalSigns
This section goes over how to modify your VitalSigns App Registration to allow for Azure Active Directory Login to VitalSigns. This does assume that you have previously set up a Graph API App Registration for use with VitalSigns.
- Navigate to the Office365 portal.
http://portal.azure.com - At the Search bar on the Top of the Screen, type in the search term App registrations, and select it from the results
- Find the existing VitalSigns App registration and select it
- Copy the Application (client) ID
- Log in to the Windows Machine that VitalSigns is installed on
- Navigate to this directory: C:\inetpub\wwwroot\VSWeb\wwwroot\ and open the config.production file in Notepad.
- Inside the bracket, add the following: "azureClientId": and paste the id in quotes, as shown on the right:
- Next, go back to the Azure Portal, and open the Authentication tab on the VitalSigns App Registration
- Click on the "Add a Platform" button, then Select the Web option.
- Enter the FQDN of the VitalSigns site into the Redirect URIs field, adding "http://" or "https://" to the beginning, and "/login" to the end, shown on the right:
- Do the same for the Front-channel logout url field.
- Check both the Access tokens and ID tokens check boxes
- Set the Supported Account types to Multitenant
2.
| 4.
| 6.
|
| 7. { "apiEndpoint": "http://hostsite.com:5000", "uatStorage": "session", "azureClientId": "IDGoesHere" } | 10. http://hostsite.com/login | 12.
|

