For installing a new instance of VitalSigns on a machine, which has not had VitalSigns previously installed.
| Note |
|---|
For IBM Notes/Domino users, you must have the IBM Notes Standard client installed and configured on the dedicated VitalSigns workstation before you install VitalSigns. |
Before you start....
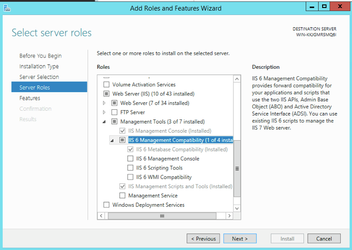
Our installer creates two web sites and an application pool under IIS. This will only work if IIS 6.0 Management Compatibility and IIS Management Scripts and Tools are installed. Our installer will attempt to install this automatically, but on some machines this is not finished by the time it is needed and the pre-req installer has to be run again. To avoid this, please take a moment to ensure that this feature is enabled before proceeding.
Step 1: Download the required files
| Info |
|---|
| You will need the VitalSigns pre-requisites, new install, and feature enablers to completely install VitalSigns. |
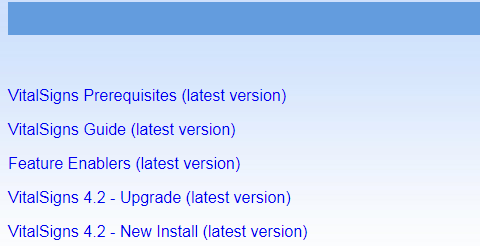
- Go to the VitalSigns Download Page.
- Locate the VitalSigns 4.2 - New Install (latest version) link and click to open.
- Download VitalSignsPrerequisites__Mongo_2012(64-bit).exe, located underneath Run this one first....
- Download AllInOneNew_VS_Mongo_42.exe, located underneath Run this file...
- Locate the Feature Enablers (latest version) link and click to open.
Download the feature enablers that relate to what you want to monitor.
Info icon false title For example: To monitor Domino, you will need the Domino enabler.
When complete, move on to Step 2.
Step 2: Execute the appropriate installers
- Open the folder where the files downloaded in the previous step are located.
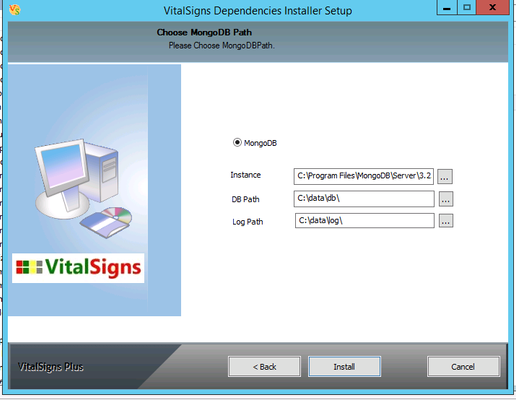
- Run VitalSignsPrerequisites__Mongo_2012(64-bit).exe as Administrator.
- Follow the instructions of the Install Wizard
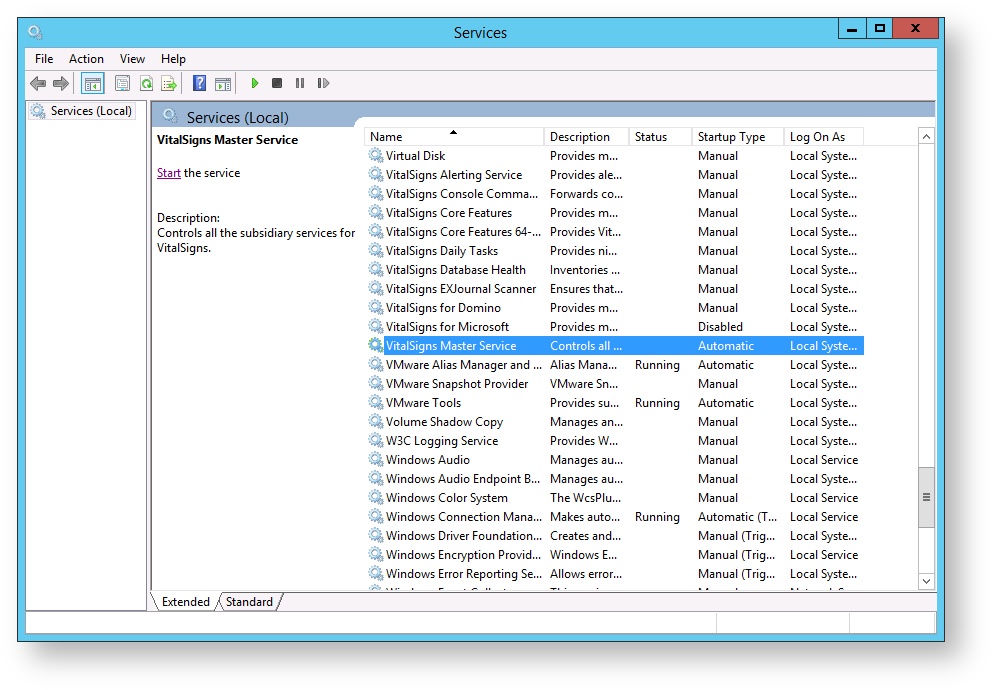
Open up the Windows Services panel and check to see if MongoDB is installed as a service, and if it it is installed, make sure it is running.
Note If MongoDB is not installed as a service, paste the following into an Administrator Command prompt:
Code Block "C:\Program Files\MongoDB\Server\3.2\bin\mongod.exe" --config "C:\Program Files\MongoDB\Server\3.2\mongod.cfg" --install
Warning If MongoDB was not installed onto the C drive, please replace "C" with the letter of the drive that MongoDB was actually installed on.
Code Block "D:\Program Files\MongoDB\Server\3.2\bin\mongod.exe" --config "D:\Program Files\MongoDB\Server\3.2\mongod.cfg" --install
- Run AllInOneNew_VS_Mongo_42.exe as Administrator.
Follow the instructions of the Install Wizard.
Note If you are not setting up a VitalSigns High Availability (HA) environment, please select Next with the default selections Note If you are setting up VitalSigns HA, then you need to decide if this is the primary node (the one which will host the front end) or a secondary node (which will perform monitoring only).
Enable security in MongoDB by adding a password.
Note In a Command Prompt, select the drive letter MongoDB is installed under by typing the letter of the drive, then a colon, like this:
C: or D:Then, navigate to the MongoDB folder by pasting the following into the prompt:
Code Block cd \Program Files\MongoDB\Server\3.2\bin
Then paste in the following code:
Code Block mongo use vitalsigns db.createUser( { user: "vsadmin", pwd: "V1talsign$", roles: [ { role: "readWrite", db: "vitalsigns" }] }) exit- In the File Explorer locate the MongoDB folder here:
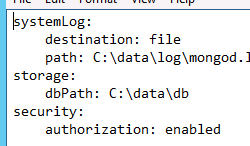
\Program Files\MongoDB\Server\3.2- Open mongod.cfg using Notepad or Notepad++
Paste this line onto the end of the file:
Code Block security: authorization: enabled
- Save the file.
| Warning |
|---|
If you are migrating from VitalSigns 3.X.X please continue on to the migration instructions. |


When complete, move on to Step 3.
Step 3: Required Manual Steps
Assign full access rights to machine.config files (there are two) to the user Network Service
| Multimedia | ||
|---|---|---|
|
Set the Application Pool to Unmanaged Code and delete the default website
| Multimedia | ||
|---|---|---|
|
Unlock IIS Handlers
Multimedia name Unlock IIS Handlers.mp4
Step 4: Configure the Software
| Tip |
|---|
| The VitalSigns installation is now complete! |
- We suggest you view
- Getting Started With VitalSigns to get started.
- Once you have imported your desired servers, go to the Windows Services on the VitalSigns workstation and start the VitalSigns Master Service.