Navigate to: Configurator » Application Settings » Business Hours tab
| Tip |
|---|
You can setup a variety of business hours to apply to specific or all servers. |
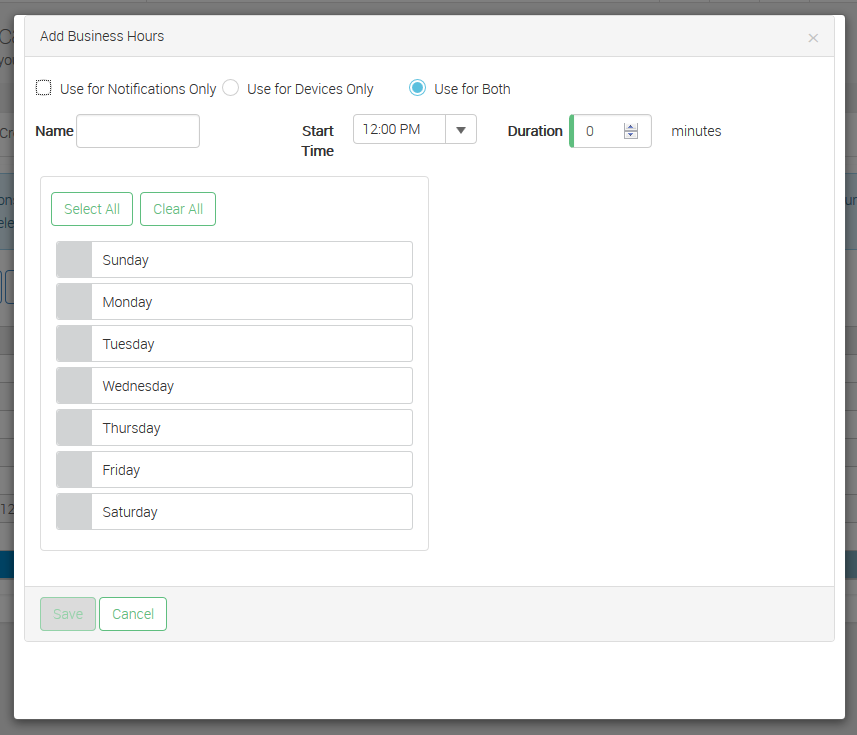
Add New Business Hours
- Click the Add button.
- Enter a name to define the Business Hours.
- Select a Start Time and Duration that corresponds to your hours of operation.
- Check the boxes next to the appropriate days of operation.
- Click the Save button.
Edit Existing Business Hours
- Select the set of Business Hours you wish to make changes to.
- Click the Edit button.
- Make any changes to the Business Hours as needed.
- Click the Save button to save the changes.
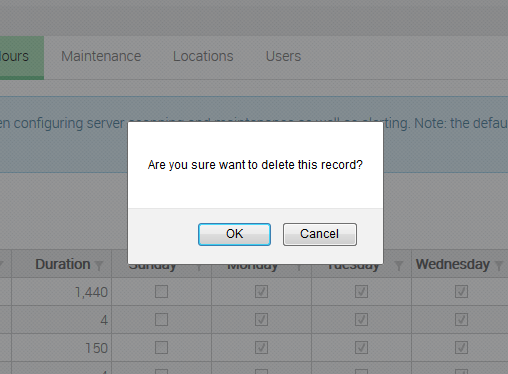
Delete Existing Business Hours
- Select the set of Business Hours you wish to delete.
- Click the Delete button.
- Click OK to confirm you would like to delete those credentials.
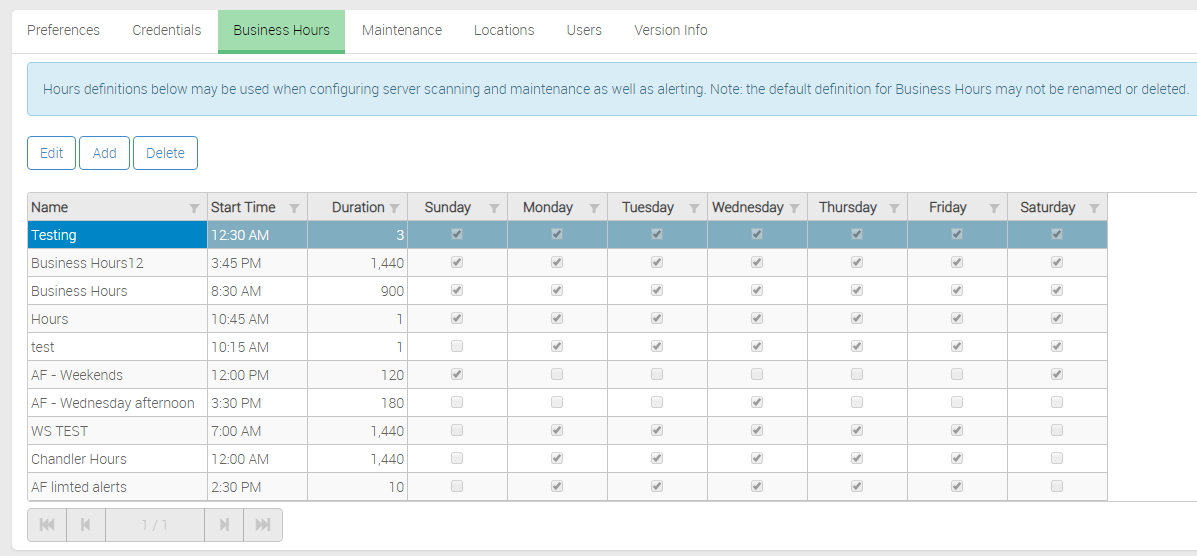
The Business hours tab allows the VitalSigns admin to set the Business Hours to be used.
About the Business Hours tab
The Business Hours tab allows a range of Hours to be set when scanning and Alerts will be be done/sent. Having a set of Business Hours set up is critical to set up Alerts, as they require a range of hours to know when to send Alerts.
The tab has three options to use on sets of Business Hours: Edit, Add and Delete.
A set of Business hours can by used either for Notifications (Alerts) or Scanning, or both.
The Hours need a Start Time, a Duration in minutes, and a selection of which days of the Week to include.
| Tip |
|---|
If you want a Business Hours to be 24 Hours a day, 7 Days a Week, simply select 12AM as the Start Time, 1440 minutes as the Duration, and select every Day. |