Hours and Destinations/Escalation

The Hours and Destinations/Escalation tab is where the VitalSigns user can configure where Alerts will be sent, and when Alerts will be sent.


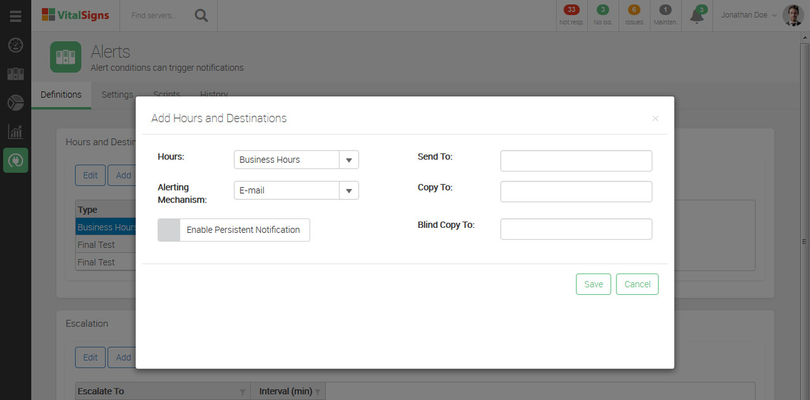
About the Hours and Destinations/Escalation tab

The Hours set in the Hours and Destinations is from a list of user-configurable entries of Hours that are configured on the Business Hours tab on the Application Settings page.The Hours and Destinations allow for dynamic configuration of what email addresses and/or phone numbers that Alerts will be sent to.

You can create alert definitions to receive a variety of alerts (i.e. dead mail, not responding, disk space low, etc.) pertaining to the overall status of your environment.

 Steps to enable/configure:

Step 1: Create Alert Hours and Destinations

  1. Click the Add button under Hours & Destinations.
  2. Select the preferred hours of alerting:

    Business Hours: Alerts will only be sent during the predefined business hours.

    Other Entries: Alerts will only be sent during the predefined hours for that particular selection.

  3. Select the preferred form of alerting from the Alerting Mechanism drop down list.

  4. Enter the email address for which the alert will be sent.

    You can enter an individual or group email address.
    You can only enter one email address per text box.
  5. Check the box next to Enable Persistent Alerting to start receiving continuous alerts (optional).

    You can enable persistent alerting to continuously inform you about a critical issue if the issue has not been resolved.
  6. Click the Save button to save the settings.


Continued:

On this page, the Escalation can also bet set. Escalation is when the underlying cause of an Alert isn't taken care of in a user-configurable threshold of time, the email address or phone number in the Escalation definition will be made aware of the Alert. 

 Steps to enable/configure:

Step 2: Add Alert Escalation Settings (Optional)

  1. Click the Add button under Escalation.
  2. Select the preferred form of alerting from the Alerting Mechanism drop down list.
  3. Enter the email address for which the alert will be sent.
  4. Enter the amount of time in minutes you would like the Escalation Interval set at.
  5. Click the Save button to save the settings.