...
You can create alert definitions to receive a variety of alerts (i.e. dead mail, not responding, disk space low, etc.) pertaining to the overall status of your environment.
The intent of the alert is to provide lead-time for administrative personal to take corrective action to minimize or prevent service interruptions. Alerts are the crucial mechanism that VitalSigns uses to communicate any environmental issues as selected by administrator.
Step 1
- Go to Alerts
...
- » Alert Definitions.
- In the Name textbox, enter a name (for reference) to define the alert.
- Click the New (
) button under Hours & Destinations.
Select the preferred method of alerting.
Info icon false Business Hours
...
: Alerts will only be sent during the
...
...
.
Specific Hours
...
: Alerts will only be sent during the selected days and hours.
All Hours
...
: Alerts will be sent at all hours (commonly chosen). - Select the preferred form of alerting from the Alerting Mechanism drop down list.
- Enter the email address for which the alert will be sent.
- You can enter an individual or group email address.
- You can only enter one email address per text box.
- Select the checkbox (
...
- Persistent Alerting to start receiving continuous alerts (this is optional, please see section 2.4.4).
- Click the Update (
...
...

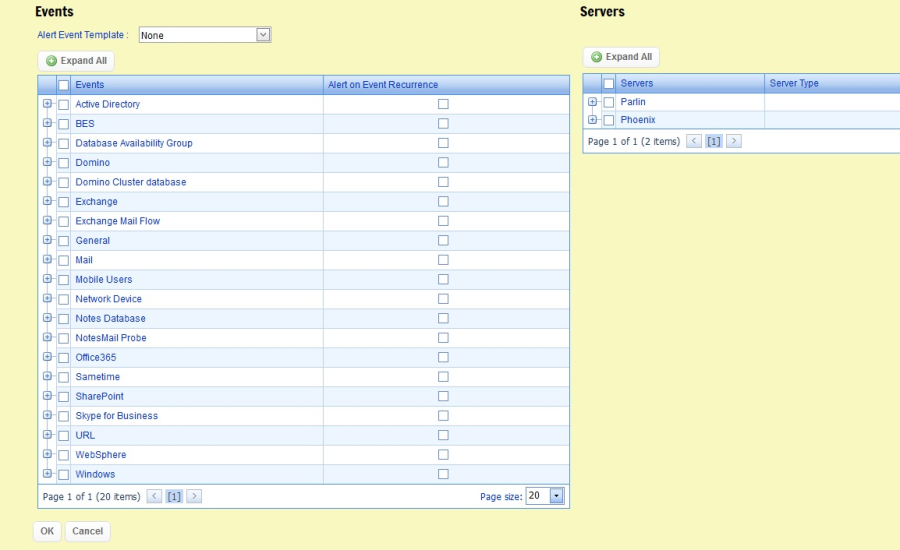
Step 2
- Expand the desired events and select the Events for which you will be alerted.
- Select the Servers the events will apply to.
- Click OK to save the settings.
...